As a courtesy we have provided this information about how to conifgure your account in this product, but we do not endorse or directly support third-party products, and we are not responisble for the functions or reliability of the product. The following directions are for adding a new account. If the account already exists in your email client then you will need to simply edit the account settings to match those outined in http://knowledge.3essentials.com/web-hosting/article/1798/How-do-I-configure-my-email-client.html.
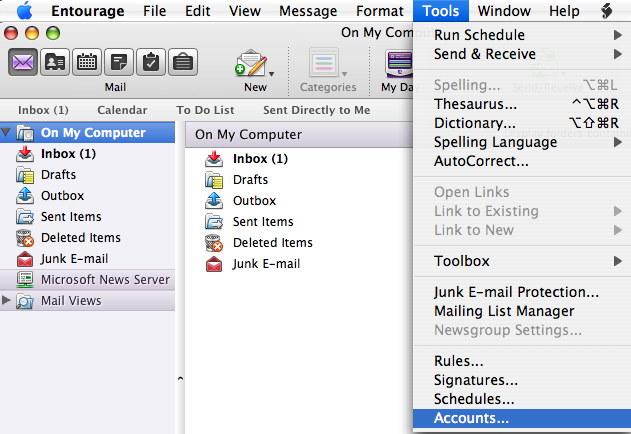
1. Open Entrouage 2008.
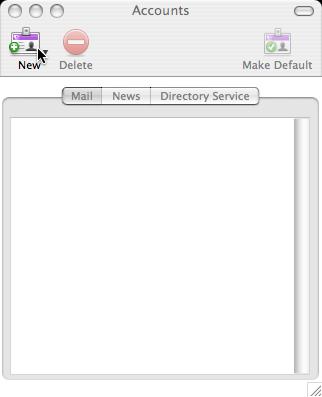
2. Click Tools and select Accounts.
3. Click New.
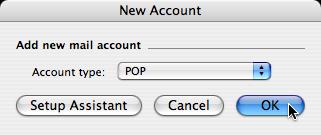
4. Set the Account Type as POP and click OK.
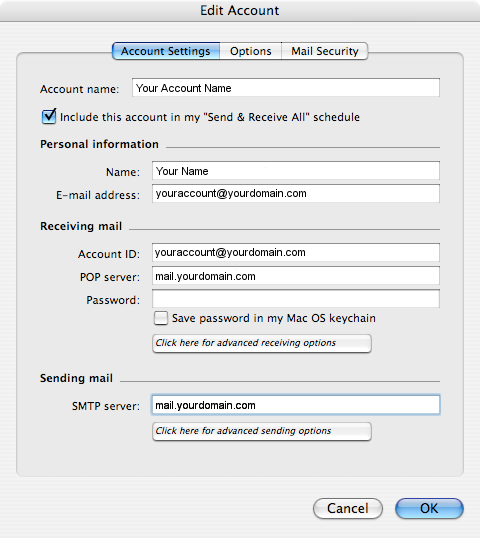
5. On the Edit Account Page do the following:
Under Account name, type a name for this account.
Under Personal Information:
Next to Name, enter the name you want people to see when you send them e-mail.
Next to E-mail address, enter your full e-mail address, for example, youraccount@yourdomain.com.
Under Receiving mail:
Next to Account ID, enter your full e-mail address again.
Next to IMAP server or POP server, enter mail.yourdomain.com ( where yourdomain.com is changed to your domain ).
Next to Password, enter your password. If you want to save your password, you can select the check box next to Save password in my Mac OS keychain.
Under Sending mail:
Next to SMTP server, enter mail.yourdomain.com ( where yourdomain.com is changed to your domain ).
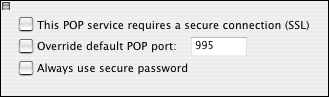
6. Click Click here for advanced receiving options. In the pop-up window that appears, uncheck the box next to This POP/IMAP service requires a secure connection (SSL), and then click the close button in the upper-left corner of the pop-up window.
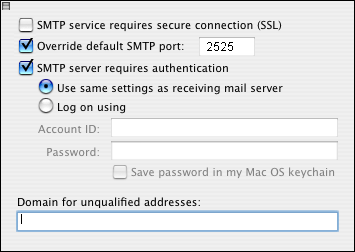
7. Click Click here for advanced sending options. In the pop-up window that appears, do the following:
Uncheck box next to SMTP service requires secure connection (SSL).
Select the check box next to Override default SMTP port and use port 2525.
Select the check box next to SMTP server requires authentication.
Select the Use same settings as receiving mail server option.
Click the close button in the upper-left corner of the pop-up window.
8. On the Options page, select the options you want.
Caution:
If you're using POP3, on the Options page, under Server options, select Leave a copy of each message on the server if you want to keep a copy of your messages on the server. If you don't do this, all messages will be removed from the server and stored locally on your computer.
9. In the Edit Account window, click OK to save your settings.
10. Close the Accounts dialog box.
|
 KB
KB