As a courtesy we have provided this information about how to conifgure your account in this product, but we do not endorse or directly support third-party products, and we are not responisble for the functions or reliability of the product. The following directions are for adding a new account. If the account already exists in your email client then you will need to simply edit the account settings to match those outined in http://knowledge.3essentials.com/web-hosting/article/1798/How-do-I-configure-my-email-client.html.
1. Open Mail (click it on the Dock or open it from the Applications folder).
2. If the "Welcome to Mail" assistant does not appear, choose Add Account from the File menu.
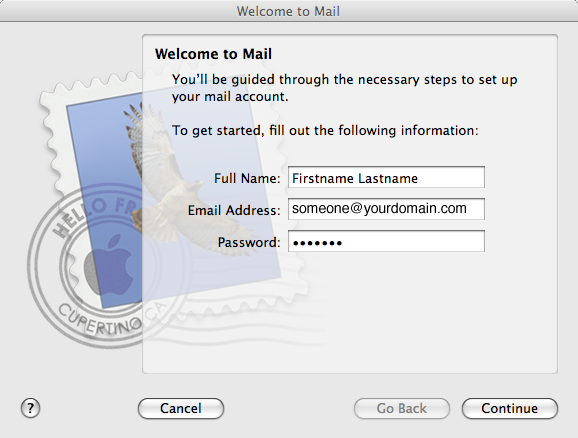
3. On the Welcome to Mail or Add Account window:
In the Full Name box, enter the name you want to display to people you send e-mail to.
In the Email Address box, enter your e-mail address.
In the Password box, enter the password for your account.
Click Continue.
Your email account password will be stored in Keychain to allow you to automatically log in to your email account when you open Mail.
4. In the Incoming Mail Server window, enter the following:
Next to Account Type, select POP or IMAP.
In the Description box, enter a name that will remind you what this e-mail account is for.
In the Incoming Mail Server box, enter mail.yourdomain.com ( change yourdomain.com to be your domain ).
In the Password box, enter the password for e-mail account if it's not already shown in that field.
Click Continue.
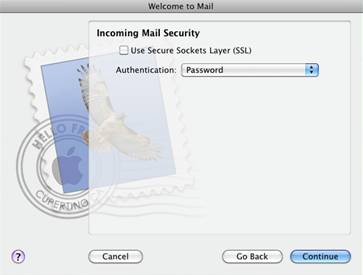
5. For Incoming Mail Security:
Uncheck Use Secure Sockets Layer (SSL).
From the Authentication dropdown menu, select Password.
Click Continue.
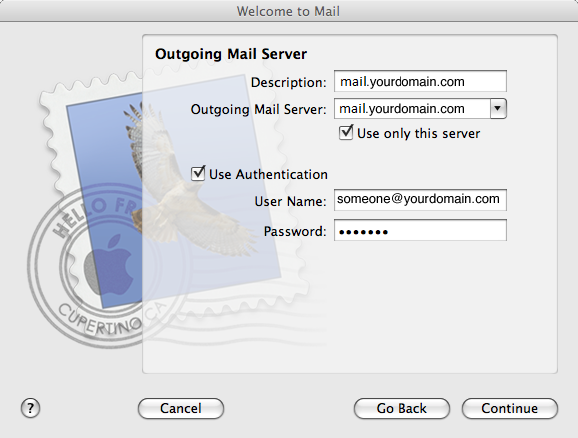
6. In the Outgoing Mail Server window, do the following:
In the Description box, enter the name for this mail server, for example, "Outlook sending server".
In the Outgoing Mail Server box, enter the mail.yourdomain.com ( change yourdomain.com to be your domain ). .
Make sure the Use only this server check box is selected.
Select the Use Authentication check box. Your user name and the password you entered for the incoming server will appear in the User Name andPassword text boxes. These values are the same for the outgoing server.
Click Continue.
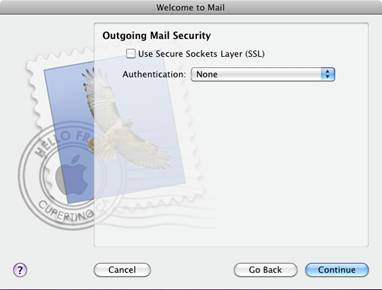
7. For Outgoing Mail Security:
Uncheck Use Secure Sockets Layer (SSL).
From the Authentication dropdown menu, select Password.
Click Continue.
8. Uncheck Take account online and click Create.
9. Select your new mailbox from the left pane of the Accounts screen.
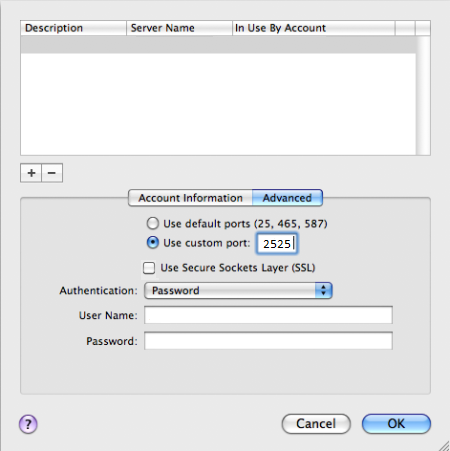
10. Under Outgoing Mail Server (SMTP) select the list to edit the settings for the server
Select Custom Port to 2525
Uncheck Use Secure Sockets Layer (SSL)
User Name: Enter your full email address
Password: Enter the email account password
Click OK
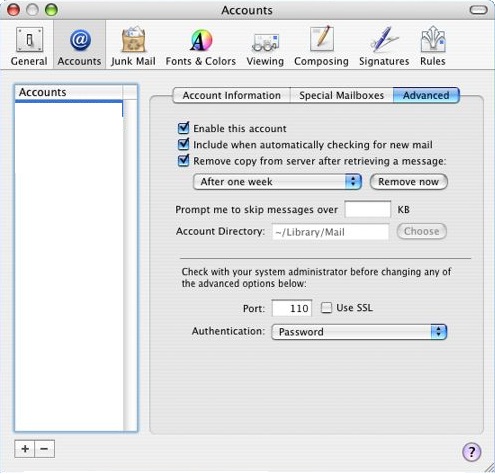
11.On the Accounts screen select the Advanced tab.
Uncheck Use SSL.
Port: 110 for POP or 143 for IMAP.
From the Authentication dropdown menu, select Password.
If you are using be sure to uncheck the Remove copy from server after retrieving a message check box if you want to leave a copy of the email on the server.
12. Your account is now setup. Close the Accounts screen and select Save. Click Get Mail to activate your account.
|
 KB
KB